Papermill
Papermill, developed by Netflix, is an open-source tool that allows users to run Jupyter notebooks 1) via the command line and 2) in an easily parameterizable way. Papermill is best-suited for Jupyter users who would like to run the same notebook with different input values. An example use case could be hyperparameter optimization for machine learning.
For general information about using Jupyter at NERSC, please see here.
Strengths of Papermill:
- Easy to use
- Allows users to run Jupyter notebooks via the command line
- Easy to run the same notebook with multiple input parameters
- Papermill will automatically save each individual completed notebook
- Provides a framework for reproducible Jupyter workflows
- Easy on Slurm
Disadvantages of Papermill:
- Code must already be in a working Jupyter notebook
- Workflow structure must be specifiable in wrapper Python script
- Best-suited for serial execution on a single node
How to use Papermill at NERSC
There are two main aspects of using Papermill at NERSC. The first is writing your Jupyter notebook and parameterizing the appropriate cell. The second is building a conda environment that will allow you to use Papermill. We'll provide an example that will show you how to run Papermill at NERSC.
No Papermill needed in your Jupyter notebook itself
Note that you don't need to import Papermill in your Jupyter notebook itself, nor do you need to be using a Jupyter kernel that includes Papermill. The default Python 3 kernel will do just fine.
The step that transforms your notebook from a normal Jupyter notebook to a Papermill-enabled Jupyter notebook is manually adding a cell tag called parameters. Depending on your version of Jupyter or Jupyterlab this might look a little different, but the idea is the same.
Parameterizing cells method depends on your Jupyter version
As of June 25, 2020, NERSC is offering Jupyter 2.1. We will include directions for using Papermill with JupyterLab 2.1 and the legacy directions for use with older versions. To use JupyterLab 2.1, make sure you select the Cori2 button on the JupyterHub login page.
Check out this demo video which shows you how to prepare your Jupyter notebook for Papermill, how to build a conda environment with Papermill, and how to run your Papermill job.
JupyterLab 2.1 directions (current NERSC version)
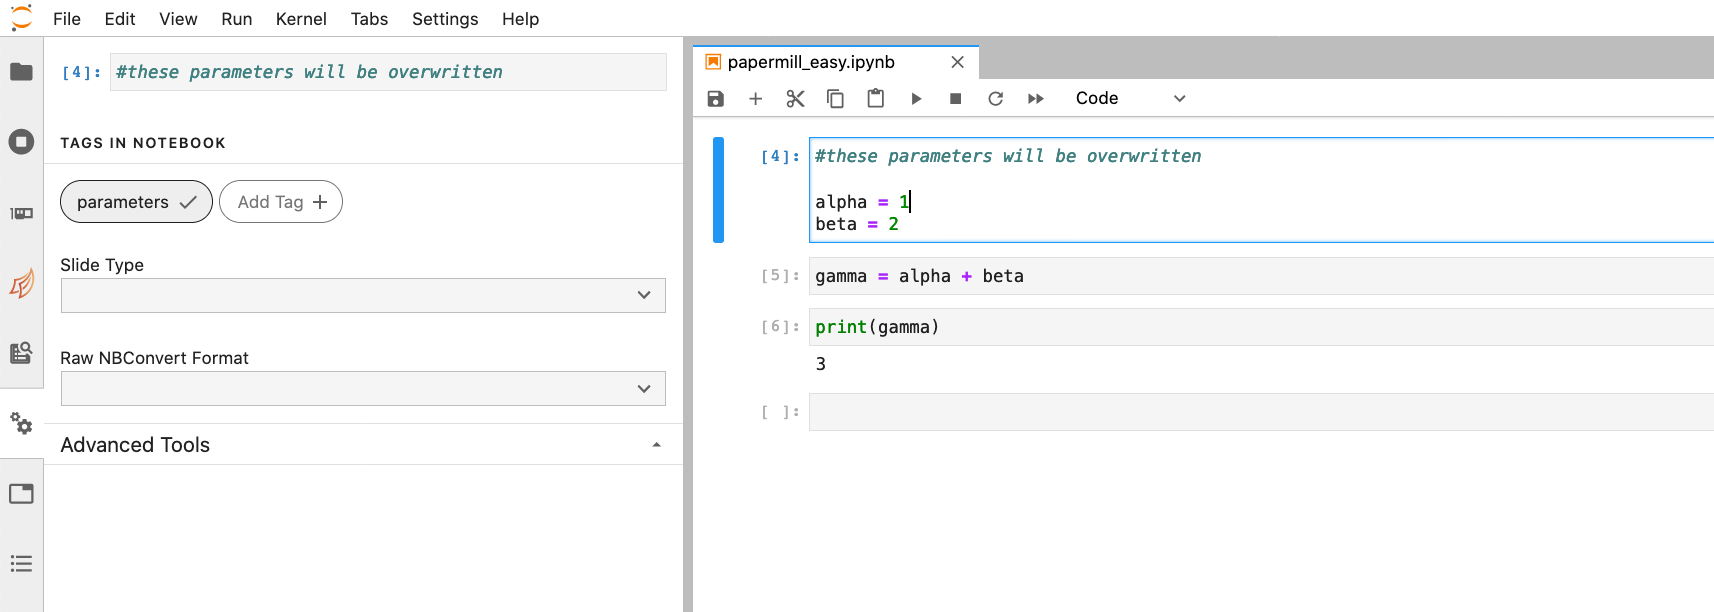
Open your Jupyter notebook in NERSC JupyterLab by selecting the Cori2 button on the JupyterHub login page. You'll need to select the cell where you will specify changing input parameters. Note that the Papermill developers advise that all parameters be placed in the same cell to avoid unexpected or undesirable behavior.
Select the cell which contains your parameters. Navigate to the left hand menu and select the gear icon. This will open a sidebar window where you have the option to click the Add Tag button. Type parameters and click the + button. This indicates to Papermill that this is the cell which will be changed depending on the input parameters you specify. Save your notebook.
Legacy JupyterLab directions (Jupyter 1.x)
Because JupyterLab < 2.0 doesn't natively support cell tags, you'll need to open your notebook in the legacy notebook interface. Here is how: after you have logged into Jupyterlab and selected a shared cpu/gpu node, you should select Launch Classic Notebook under the Help menu in the top left corner. Navigate to the notebook you will parameterize via Papermill.
Once your notebook has been opened using the legacy Jupyter notebook interface, you'll need to select the cell where you will specify changing input parameters. Note that the Papermill developers advise that all parameters be placed in the same cell to avoid unexpected or undesirable behavior.
To tag this cell as a parameters cell, you'll need to navigate to the View menu and click on Cell Toolbar and Tags.
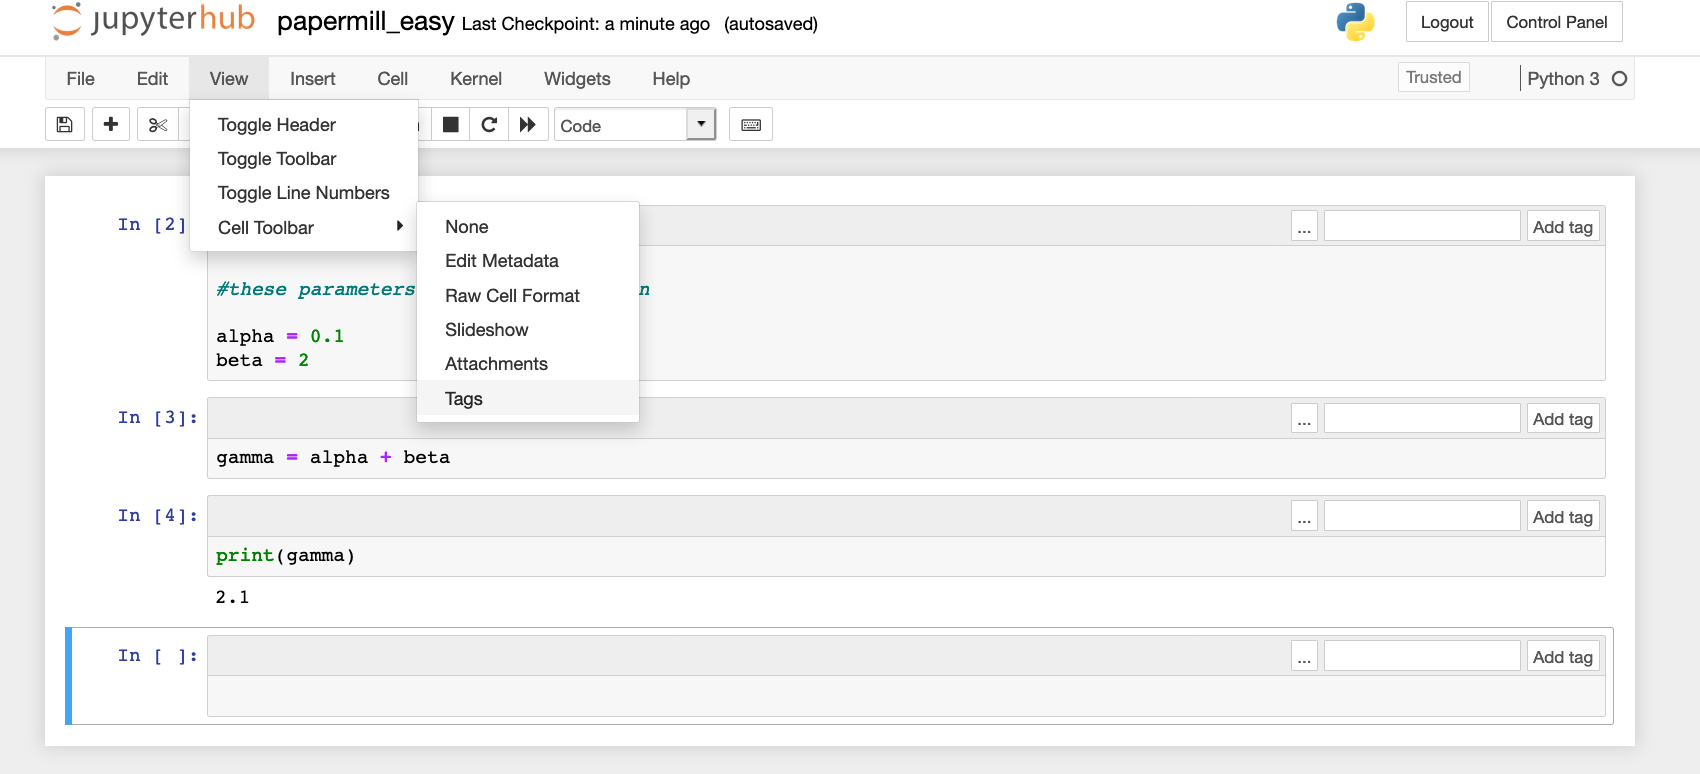
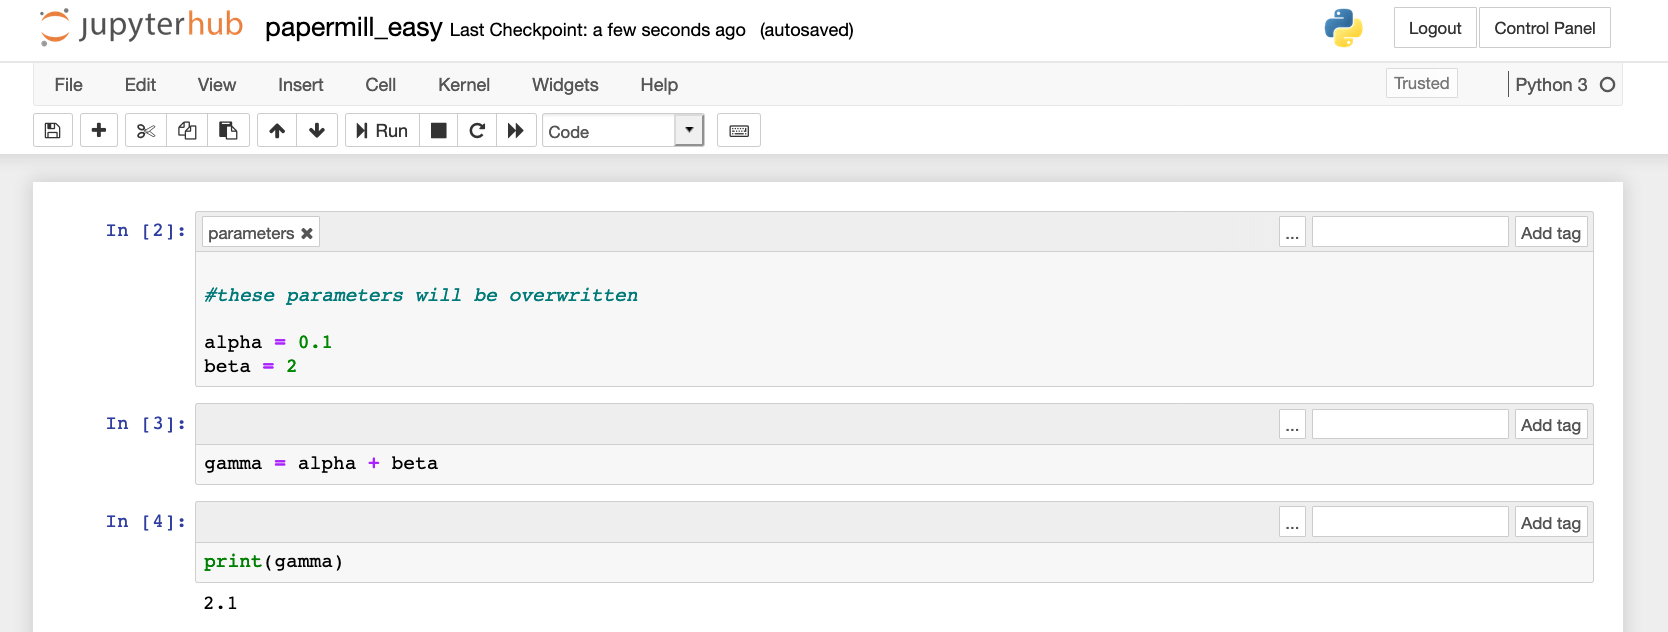
This will add the option to tag each cell in your notebooks. You should select the cell with your changeable parameters and add the tag parameters. Once your cell is tagged, it is ready for use with Papermill. Save your notebook.
Here is what our parameterized notebook papermill_easy.ipynb looks like:
Building your Papermill environment
Papermill is not installed in the NERSC default Python environment, so if you'd like to use it, you need to build your own Papermill conda environment. This is easy:
module load python
conda create -n mypapermillenv python=3.7
source activate mypapermillenv
conda install numpy ipykernel
conda install -c conda-forge papermill
Note that we install numpy first using our default channels so that we install numpy that uses Intel's MKL (math kernel library). We install papermill last since it requires conda-forge which will by default install libraries that may be less optimized for Cori (OpenBLAS instead of MKL, for example).
Running your Papermill code
Now that you've parameterized your Jupyter notebook papermill_easy.ipynb and built your conda environment, you're ready to go. Unlike typical Jupyter workflows, you don't have to open or even use Jupyter to run Papermill which might seem a little counterintuitive. This is actually very nice because it doesn't require leaving Jupyter open to run which can sometimes be fragile or tedious.
You can request a compute node either interactively or submit your Papermill workflow via a batch job.
On our interactive node or in our batch script:
module load python
source activate mypapermillenv
python run_papermill.py
This is our Python script run_papermill.py:
import papermill as pm

for i in range(10):
    alpha = i
    beta = i+2
    pm.execute_notebook(input_path='papermill_easy.ipynb',
                      output_path='easy_output_{}.ipynb'.format(i),
                      parameters={'alpha': alpha, 'beta': beta})
In our example script we are specifying several values of alpha and beta via a garden variety Python loop. This script will create 10 output notebooks, each corresponding to the specific pair of inputs for alpha and beta. More sophisticated orchestration is also possible.
This will run your parameterized papermill_easy notebook and create and save 10 new notebooks. Voila!
You'll see output that looks like this:
(papermill) stephey@nid00039:/global/cscratch1/sd/stephey/test_papermill> python run_papermill.py
Executing: 100%|█████████████████████████████████████████████████████████████████████████████████████████████████| 4/4 [00:08<00:00,  2.01s/cell]
Executing: 100%|█████████████████████████████████████████████████████████████████████████████████████████████████| 4/4 [00:06<00:00,  1.61s/cell]
Executing: 100%|█████████████████████████████████████████████████████████████████████████████████████████████████| 4/4 [00:05<00:00,  1.45s/cell]
Executing: 100%|█████████████████████████████████████████████████████████████████████████████████████████████████| 4/4 [00:06<00:00,  1.70s/cell]
Executing: 100%|█████████████████████████████████████████████████████████████████████████████████████████████████| 4/4 [00:05<00:00,  1.46s/cell]
Executing: 100%|█████████████████████████████████████████████████████████████████████████████████████████████████| 4/4 [00:04<00:00,  1.22s/cell]
Executing: 100%|█████████████████████████████████████████████████████████████████████████████████████████████████| 4/4 [00:06<00:00,  1.61s/cell]
Executing: 100%|█████████████████████████████████████████████████████████████████████████████████████████████████| 4/4 [00:07<00:00,  1.90s/cell]
Executing: 100%|█████████████████████████████████████████████████████████████████████████████████████████████████| 4/4 [00:08<00:00,  2.19s/cell]
Executing: 100%|█████████████████████████████████████████████████████████████████████████████████████████████████| 4/4 [00:10<00:00,  2.52s/cell]